VS Code 扩展开发实践
Jun 16, 2022
背景介绍
项目团队设计规范变更,之前定义好的一些颜色有部分修改,需要将现有代码库里硬编码的颜色修改成符合新规范,这部分工作其实非常的机械化。
我们之前接入了 WindiCSS,也配置了一部分颜色 token。但其实最后落地的并不是很好,可能有两个原因:
- 设计侧本身就没有太遵守规范,也没有对研发去强调这个规范
- 我们的开发习惯,大多是直接从 figma 复制 CSS,并不会自己主动去查看这个颜色是属于哪个 token 然后手动去引用。
这导致了设计规范有变更,我们就要从代码里去查找替换。
这里的一个想法是,我们希望在不改变大家开发习惯的同时,对于明确在规范中的颜色,尽可能的通过变量来引用,这样未来即使设计规范再次变更,我们也只需要修改一个地方,而不用全局的去查找替换。
实现这个想法的方式有很多种,例如编写一个脚本,或者开发一个 ESLint 插件等等。但我这一次选择的是开发一个 VS Code 扩展来做这个事情。
创建扩展
全局安装两个包
npm install -g yo generator-code
其中 yo 这个包是一个生成器,generator-code 是一个类似模板这样的东西。
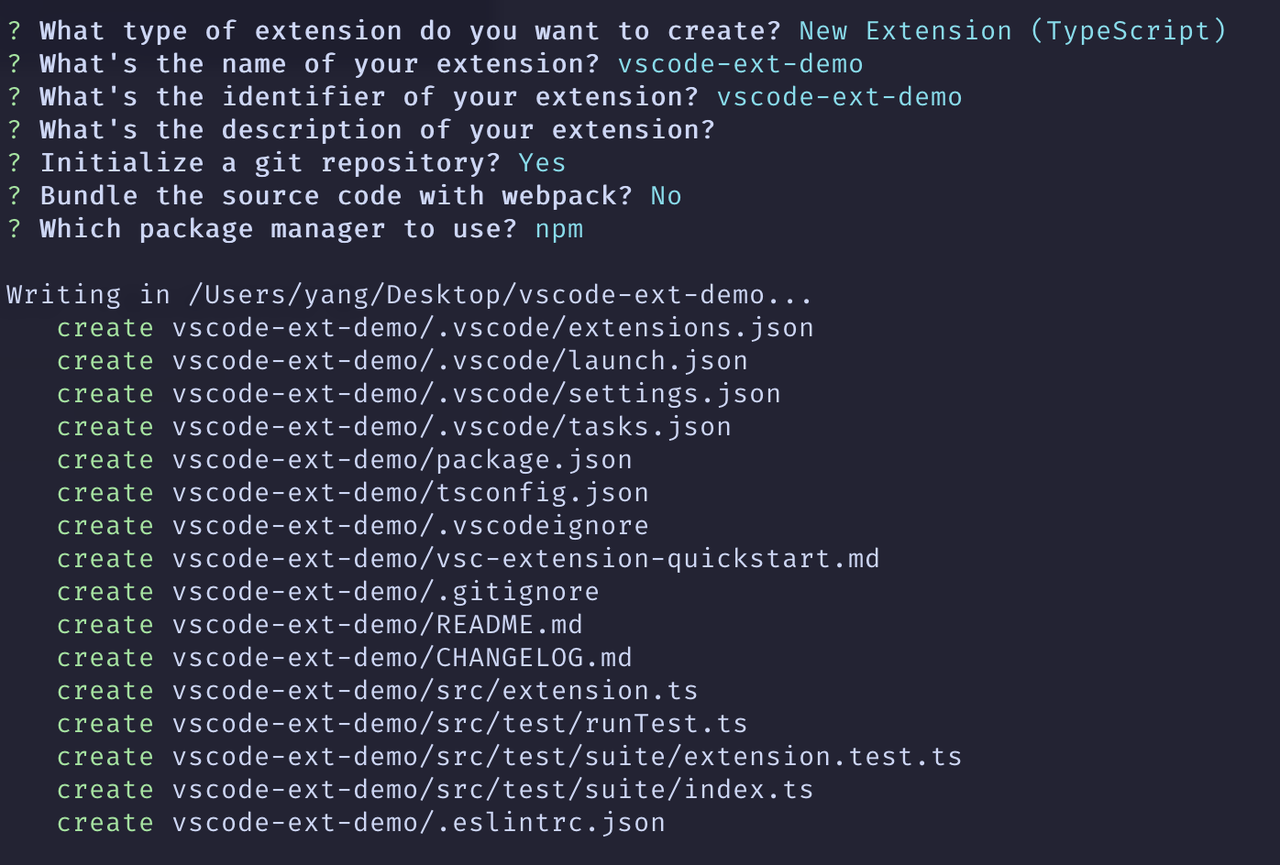
你可以通过 yo 或者 yo code 来快速创建一个 VS Code 扩展项目,在这里我选的是第一个 New Extension (TypeScript)
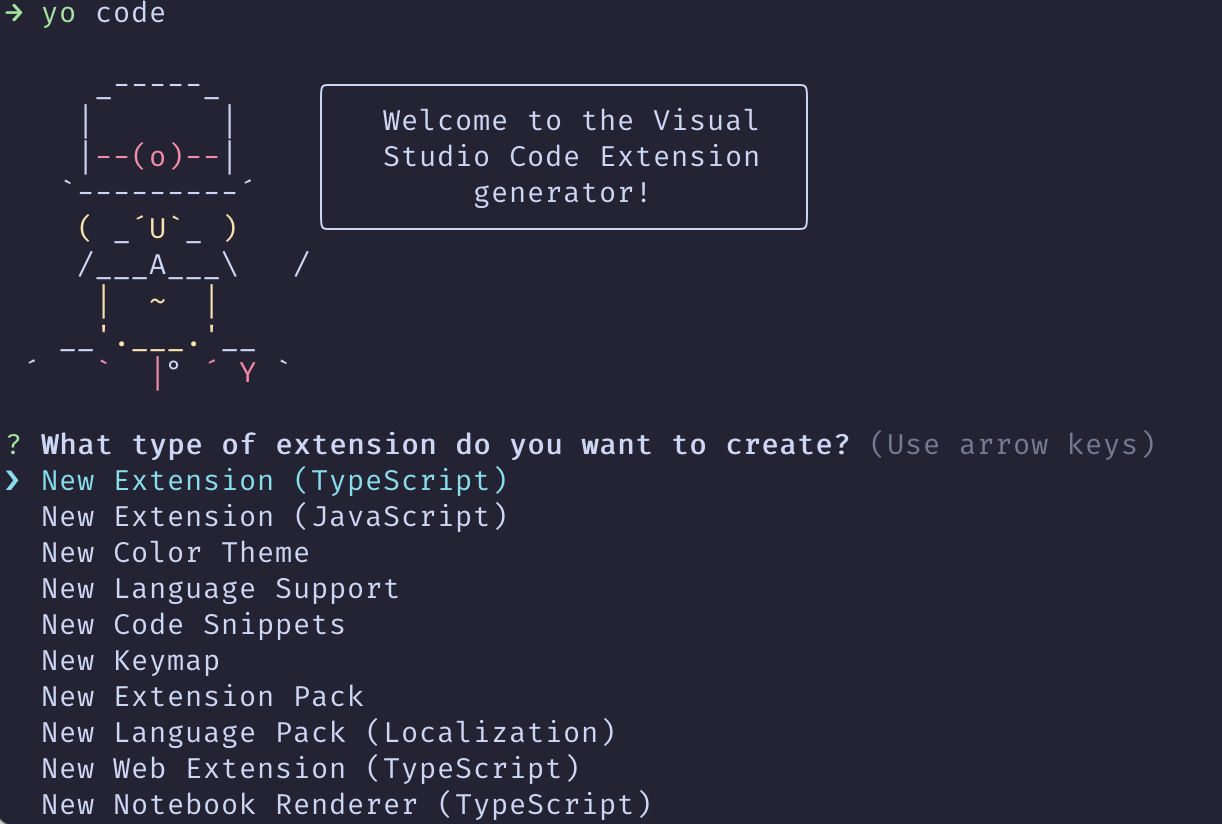
接下来会让你做一些选择,包括包管理器等等,然后自动帮你创建目录并且安装依赖。
开发环境
在你创建项目之后,npm install 安装依赖。你的插件代码都在 src/extension.ts 这个文件里。
插件的启动时机,插件功能(贡献点),需要你在 package.json 的 activationEvents 和 contributes 下声明,例如脚手架默认的:
{
  // .....
  "activationEvents": [
     "onCommand:vscode-ext-demo.helloWorld" // 在调用这条命令时启动
  ],
  "contributes": {
     "commands": [ // 提供了一条命令
        {
           "command": "vscode-ext-demo.helloWorld",
           "title": "Hello World"
        }
     ]
   },
}
然后按 F5,就可以启动一个窗口调试你的扩展。这里的原理是,.vscode 目录下有一个 launch.json 和 tasks.json 文件,VS Code 内置的调试工具和任务执行工具会认这两个文件作为配置。
// launch.json
{
  "version": "0.2.0",
  "configurations": [
    {
      "name": "Run Extension",
      "type": "extensionHost",
      "request": "launch",
      "args": [
        "--extensionDevelopmentPath=${workspaceFolder}"
      ],
      "outFiles": [
        "${workspaceFolder}/out/**/*.js"
      ],
      "preLaunchTask": "${defaultBuildTask}" // 开始调试前,先调用默认的 task
    }
}

// tasks.json
{
  "version": "2.0.0",
  "tasks": [
    {
      "type": "npm",
      "script": "watch", // 指向 npm run watch
      "problemMatcher": "$tsc-watch",
      "isBackground": true,
      "presentation": {
        "reveal": "never"
      },
      "group": {
        "kind": "build",
        "isDefault": true
      }
    }
  ]
}
脚手架默认使用 tsc 编译。但其实我习惯用别的工具来编译,因此我们可以做下改造。
改造
介绍下我使用的几个工具包:
- tsup,基于 esbuild 的打包工具,由国人 egoist 开发
- tsx,这里 tsx 不是指 react 的 tsx,而是 TypeScript Execute, 一个同样是基于 esbuild 的 ts 文件执行工具
- npm-run-all,运行 npm scripts 的工具,用这个的目的是我想使用一条命令启动两个 watch 进程,如果直接通过
npm run watch:a && npm run watch:b是顺序执行的,那么 watch:b 是不会被执行的,这个包提供了一个run-p命令可以并行的执行 npm scripts.
于是我们的开发脚本变成了
{
  "scripts": {
    "dev": "run-p dev:*",
    "dev:extension": "tsup --watch",
    "dev:package": "tsx watch scripts/update-package.ts",
  }
}
这里多了一个 update-package.ts 文件,它会去更新 package.json 文件。 前面说了插件提供的功能需要在 package.json 里声明,但是我不想在开发的时候代码里加了一个命令,还要手动在 package.json 里添加,因此提供了一个脚本来做个事情。
API & samples
VS Code 暴露给扩展的 API References 写的其实不是很好,直接看这个的话你会不知道从哪里入手。 VS Code 提供了一个 vscode-extension-samples 项目作为参考,一般都是参考这个项目里类似的扩展是怎么写的,它会提供一个 API 使用示例。
例如这个扩展是和「保存时修改代码」或者「代码格式化」相关的,因此可以参考 code-action-sample。
另外,在开发过程中需要去寻找一些 API 时,我一般也不会跳去看文档,而是直接跳转到 vscode 类型定义文件里搜关键字去看 API,类型定义文件里注释很全,他们的网页文档其实也是用这里面的注释生成的。
功能实现
需求
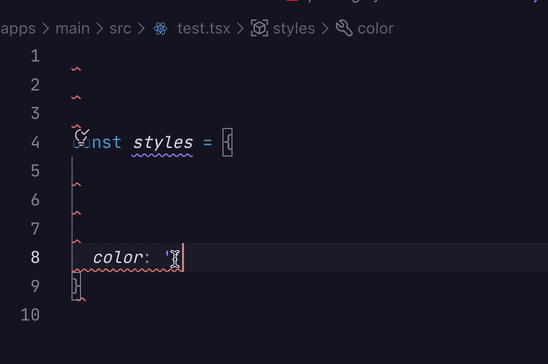
- 代码里的字面量的颜色,如果在配置的颜色 token 中需要划线提示
- 保存时,需要自动替换成 CSS 变量
- 需要支持 alpha,即
#111111和rgba(100, 100, 100, 0.5)都能够转换 - 支持自定义配置
思路
在打开任意文件和输入时,监听文件内容,扫描出字面量的颜色,从配置里查找是否有这个颜色, 需要注意颜色有多种不同的表示方法,例如 rgb, rgba, hex(我们都只用这三个)等。如果有的话,使用 VS Code 的 API 给颜色添加波浪线,鼠标放上去可以展示修改建议和手动 Fix。
在用户保存时,对前面检测到的波浪线的内容,自动替换成 CSS 变量。
CSS 变量声明有特殊约定,不是直接声明成 hex 或者 rgba, 而是声明成下面这种格式:
--light-gray-10: 6, 20, 41;
这样可以通过 rgb(var(--light-gray-10)) 或者 rgba(var(--light-gray-10), 0.1) 支持不同的 alpha 值,而不用针对每个 alpha 都声明一个变量。
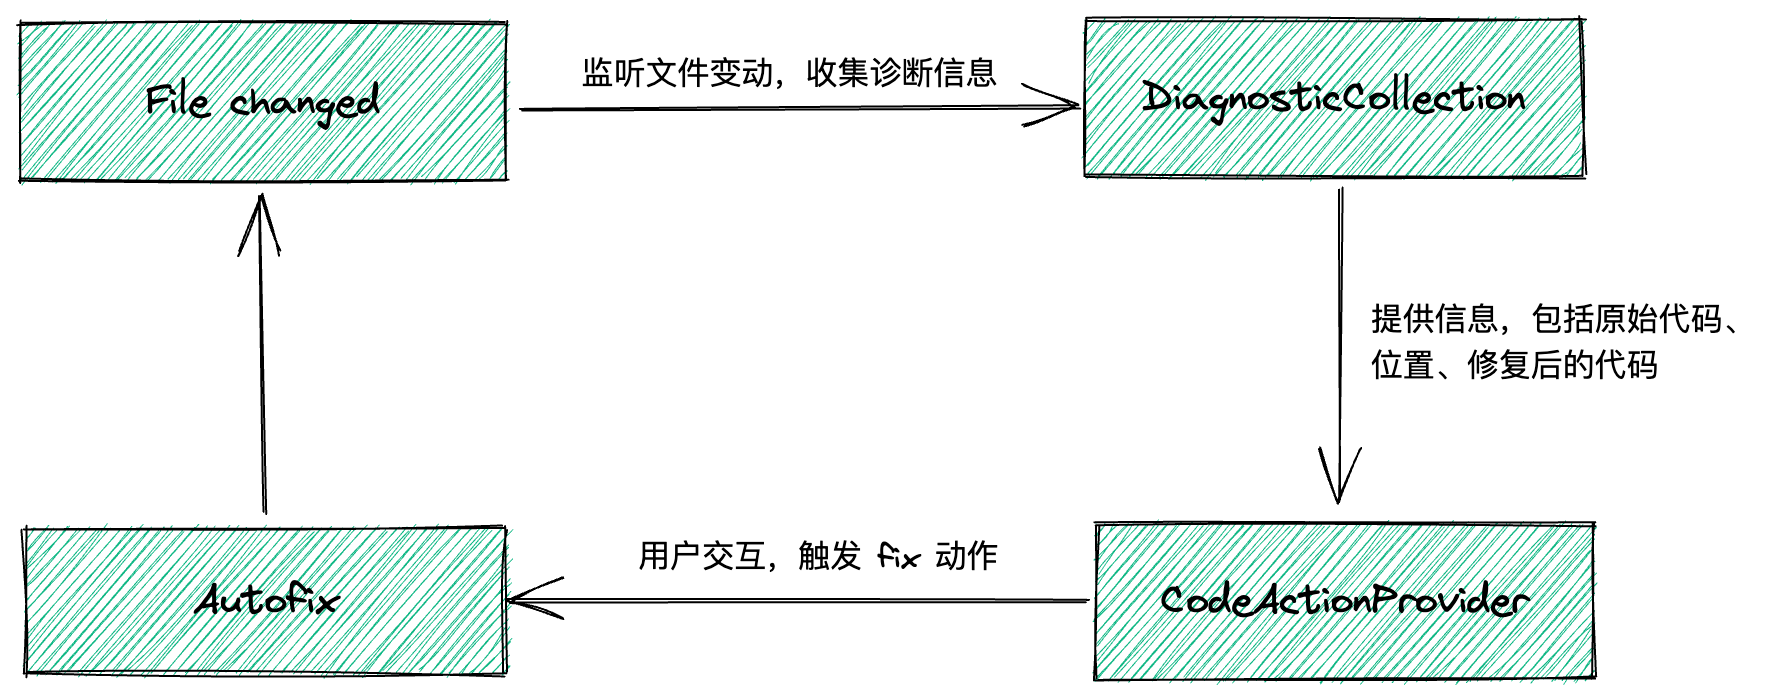
原理
对于这类修改代码的需求,VS Code APIs 提供了 CodeAction 和 Diagnostic 两个模块。其中 CodeAction 可以用来修改代码,或者鼠标放在某代码片段上的时候展示一个命令等等。而 Diagnostic 则是诊断代码,可以给代码添加波浪线,展示错误提示之类的。
两个模块相互配合,Diagnostic 负责提供数据或者信息,CodeAction 负责代码修改。
代码实现
VS Code 的 API 非常的 OOP,因此我们可以很容易的通过继承的方式扩展。
先看最外层的代码,基本上就是我们的代码框架了。
export function activate(context: vscode.ExtensionContext) {
  // 创建一个 DiagnosticCollection 并监听文档变更
  const colorDiagnosticCollection =
    vscode.languages.createDiagnosticCollection('color-changer')
  subscribeToDocumentChanges(context, colorDiagnosticCollection)

  // push 进 subscriptions, 扩展销毁时会清理,就像 useEffect 的返回值一样
  context.subscriptions.push(colorDiagnosticCollection)

  context.subscriptions.push(
      // 注册 CodeActionsProvider, 需要指定支持哪些语言和一个 CodeActionProvider 实例
      vscode.languages.registerCodeActionsProvider(languages, new ColorCodeActionProvider(), {
        providedCodeActionKinds: ColorCodeActionProvider.providedCodeActionKinds,
      })
  )
}
这里没什么特别的,主要逻辑其实都在subscribeToDocumentChanges 和 ColorCodeActionProvider 里
subscribeToDocumentChanges 的逻辑其实也很简单,就是监听各种文档变更,然后调用 refreshDiagnostics
export function subscribeToDocumentChanges(
  context: vscode.ExtensionContext,
  colorDiagnostics: vscode.DiagnosticCollection
): void {
  if (vscode.window.activeTextEditor) {
    refreshDiagnostics(vscode.window.activeTextEditor.document, colorDiagnostics)
  }

  context.subscriptions.push(
    vscode.window.onDidChangeActiveTextEditor(editor => {
      if (editor) {
        refreshDiagnostics(editor.document, colorDiagnostics)
      }
    })
  )

  context.subscriptions.push(
    vscode.workspace.onDidChangeTextDocument(e => refreshDiagnostics(e.document, colorDiagnostics))
  )

  context.subscriptions.push(
    vscode.workspace.onDidCloseTextDocument(doc => colorDiagnostics.delete(doc.uri))
  )
}
refreshDiagnostics 的逻辑就是
export async function refreshDiagnostics(
  doc: vscode.TextDocument,
  colorDiagnostics: vscode.DiagnosticCollection
) {
  if (!languages.includes(doc.languageId)) {
    return
  }

  const diagnostics: vscode.Diagnostic[] = []
  for (let lineIndex = 0; lineIndex < doc.lineCount; lineIndex++) {
    const lineOfText = doc.lineAt(lineIndex)

    const result = extractColors(lineOfText.text)

    result.forEach(colorInfo => {
      // 从配置文件中获取颜色 token,具体实现这里先忽略
      const token = getToken(colorInfo.color)
      if (!token) {
        return
      }

      const range = new vscode.Range(lineIndex, colorInfo.start, lineIndex, colorInfo.end)
      diagnostics.push(
        ColorDiagnostic.create(range, {
          ...colorInfo,
          token: token,
        })
      )
    })
  }

  // 将收集到的 diagnostics 全部存到 colorDiagnostics 里
  colorDiagnostics.set(doc.uri, diagnostics)
}
这里比较关键的是 extractColors 和 ColorDiagnostic.create
extractColors 方法就是从每一行的文本当中,提取出类似颜色的字符串,这里匹配的方式很简单,就是利用正则,然后会返回颜色代码片段的起始位置、结束位置,颜色值等信息。
export type ColorInfo = {
  color: string
  format: ColorFormat
  start: number
  end: number
  token: ColorToken
}


const regExps: Record<ColorFormat, () => RegExp> = {
  rgba: () => /rgba(\s*\d{1,3}\s*,\s*\d{1,3}\s*,\s*\d{1,3}\s*,\s*((\d)|(0?.\d{1}))\s*)/gi,
  rgb: () => /rgb(\s*\d{1,3}\s*,\s*\d{1,3}\s*,\s*\d{1,3}\s*)/gi,
  hex: () => /#(([abcdefABCDEF\d]{6,6})|([abcdefABCDEF\d]{3,3}))/gi,
}

export function extractColors(text: string): Array<Omit<ColorInfo, 'token'>> {
  const result: Array<Omit<ColorInfo, 'token'>> = []

  for (const format of formats) {
    const re = regExps[format]()
    const res = [...text.matchAll(re)] // 匹配所有颜色
    if (!res.length) {
      continue
    }

    res.forEach(match => {
      const color = match[0].trim()
      const start = match.index!
      const end = start + color.length

      result.push({
        color,
        format,
        start,
        end,
      })
    })
  }

  return result
}
ColorDiagnostic 这个类则是提供一些信息,比如传给父类 vscode.DiagnosticSeverity.Warning 会展示一条警告,鼠标放在代码上或者 PROBLEMS 面板里还会展示 message, code 等
// 继承自 vscode.Diagnostic
export class ColorDiagnostic extends vscode.Diagnostic {
  colorInfo: ColorInfo

  // fixCode 表示自动格式化后的代码
  fixCode: string

  static create(range: vscode.Range, colorInfo: ColorInfo) {
    return new ColorDiagnostic(range, colorInfo)
  }

  static isInstance(v: any): v is ColorDiagnostic {
    return v instanceof ColorDiagnostic
  }

  constructor(range: vscode.Range, colorInfo: ColorInfo) {
    const token = colorInfo.token
    const alpha = Color(colorInfo.color).alpha()
    const fixCode = `rgba(var(--${token?.name}), ${alpha})`

    const message = `Replace ${colorInfo.color} to ${fixCode}`
    super(range, message, vscode.DiagnosticSeverity.Warning)

    this.colorInfo = colorInfo

    this.code = 'color-changer'

    this.fixCode = fixCode
  }

  // 创建一个 fix 的 codeAction, 后面 codeActionProvider 用到
  createFix(document: vscode.TextDocument, kind: vscode.CodeActionKind) {
    const fix = new vscode.CodeAction(`Fix: change to ${this.fixCode}`, kind)
    fix.edit = this.createEdit(document)
    fix.isPreferred = true
    return fix
  }

  private createEdit(document: vscode.TextDocument) {
    const edit = new vscode.WorkspaceEdit()
    // 修改代码
    edit.replace(document.uri, this.range, this.fixCode)
    return edit
  }
}
然后 CodeActionProvider 的逻辑很简单,实现 provideCodeActions,将收集到的诊断信息返回一个 CodeAction 数组,VS Code 会去调用这个方法拿到其返回值。
同一个代码片段可以同时有多个 CodeAction,例如我这里对于同一个 diagnostic,会创建两个 CodeAction。其中 vscode.CodeActionKind.QuickFix 要手动点才能 fix,vscode.CodeActionKind.SourceFixAll 可以配置保存时自动格式化。
export class ColorCodeActionProvider implements vscode.CodeActionProvider {
  public static readonly providedCodeActionKinds = [
    vscode.CodeActionKind.QuickFix,
    vscode.CodeActionKind.SourceFixAll,
  ]

  provideCodeActions(
    document: vscode.TextDocument,
    range: vscode.Range | vscode.Selection,
    context: vscode.CodeActionContext
    // token: vscode.CancellationToken
  ): vscode.CodeAction[] {
     // 所有的 diagnostics 都可以拿到,例如 eslint 之类的其他代码检查工具
     return context.diagnostics
      .filter(ColorDiagnostic.isInstance) // 我们是格式化颜色,只过滤出我们关心的 ColorDiagnostic
      .reduce<vscode.CodeAction[]>((actions, diagnostic) => {
        actions.push(
            diagnostic.createFix(document, vscode.CodeActionKind.QuickFix)
        )
        actions.push(
            diagnostic.createFix(document, vscode.CodeActionKind.SourceFixAll)
        )

        return actions
      }, [])
  }
}
最核心的功能实现就上面这些代码。
颜色配置
我们希望可以由用户提供一份配置,这样不同的项目或者业务都可以使用这个插件。引入配置后,我们不仅仅需要处理配置解析和读取的逻辑,还要处理配置更新后,我们状态也要更新。
VS Code 提供了 Configuration API, 可以在 package.json 里的 contributes 里配置我们声明了哪些配置
"contributes": {
    "configuration": {
      "type": "object",
      "title": "color-changer",
      "properties": {
        "color-changer.colorrc": {
          "type": "string",
          "default": "${workspaceFolder}/colorrc.json",
          "description": "json rules config file path, default is '${workspaceFolder}/colorrc.json'"
        }
      }
    }
  },
配置后代码就可以通过 vscode.workspace.getConfiguration().get<string>('color-changer.colorrc') 拿到配置的值。
export class Config {
  tokens: Record<string, ColorToken> = {}

  async refresh(toast = false) {
    const workspaceRoot = vscode.workspace.workspaceFolders![0].uri
    let rcFilePath =
      vscode.workspace.getConfiguration().get<string>(ConfigName.colorrc) ||
      `${workspaceRoot.path}/colorrc.json`
    // 替换占位符
    rcFilePath = rcFilePath.replace('${workspaceFolder}', workspaceRoot.path)
    try {
      // 解析配置文件内容
      const buffer = await vscode.workspace.fs.readFile(vscode.Uri.file(rcFilePath))
      const content = new TextDecoder().decode(buffer)
      const rules = JSON.parse(content) as Rules

      this.tokens = Object.keys(rules).reduce((res, key) => {
        res[key] = {
          name: key,
          value: Color(rules[key].value).hex(), // 全部转换成hex形式容易比较
        }
        return res
      }, {} as any)

      console.info('[Color Changer]: Tokens have been refreshed!')

      if (toast) {
        vscode.window.showInformationMessage('[Color Changer]: Tokens have been refreshed!')
      }

      return true // 返回 true 表示成功,false 表示失败
    } catch (error) {
      console.error('[Color Changer]: Resolve color rules error', error)
      if (toast) {
        vscode.window.showErrorMessage('[Color Changer]: Resolve color rules error.')
      }

      return false
    }
  }

  get(value: string) {
    const keys = Object.keys(this.tokens)
    const color = Color(value).alpha(1)
    const hex = color.hex()

    for (const key of keys) {
      if (this.tokens[key].value === hex) {
        return this.tokens[key]
      }
    }

    return null
  }
}
然后我们就可以在 extension.ts 里加一个监听配置文件更新的逻辑:
context.subscriptions.push(
    vscode.workspace.onDidChangeConfiguration(evt => {
      if (evt.affectsConfiguration(ConfigName.colorrc)) {
        config.refresh(true) // 重新生成 tokens
      }
    })
)
我们前面收集 diagnostics 的逻辑也可以从 config 上获取到对应颜色字面量的的 token 定义
export async function refreshDiagnostics(
  doc: vscode.TextDocument,
  colorDiagnostics: vscode.DiagnosticCollection
) {
  // ...
  const result = extractColors(lineOfText.text)

  result.forEach(colorInfo => {
      const token = config.get(colorInfo.color)
      // ...
  })

  // ...
}
忽略注释
对于一些出现在注释里的代码,例如: // #123456 或者 /* #123456 */ ,我们不期望这些颜色被格式化,需要额外做一些处理。
在我们对文件中每一行的文本提取颜色时,我们可以找出这一行当中注释的开始坐标和结束坐标,如果一个颜色在注释的范围内,我们就忽略它.
export function extractColors(text: string): Array<Omit<ColorInfo, 'token'>> {
  const result: Array<Omit<ColorInfo, 'token'>> = []

  // 找出所有注释
  const comments = getComments(text)

  for (const format of formats) {
    // ....
    res.forEach(match => {
      // 在注释内就忽略
      if (comments.some(comment => isInComment({ start, end }, comment))) {
        return
      }

      // ....
    })
  }

  return result
}


function getComments(line: string) {
  const comments: Array<Comment> = []

  let blockCommentStart = -1

  let i = 0

  while (i < line.length) {
    const curChar = line[i]
    const nextChar = line[i + 1]

    if (blockCommentStart > -1) {
      // 寻找块注释结束字符 `*/`
      if (curChar === '*' && nextChar === '/') {
        comments.push({
          start: blockCommentStart,
          end: i + 1,
        })

        blockCommentStart = -1
      }
      i++
      continue
    }

    // 如果找到了 `//`,那后面的全部都是注释了
    if (curChar === '/' && nextChar === '/') {
      comments.push({ start: i, end: line.length })
      return comments
    }

    // 如果找到了 `/*`, 那我们就需要去找结束的 `*/`
    if (line[i] === '/' && nextChar === '*') {
      blockCommentStart = i
      i += 2
      continue
    }

    i++
  }

  if (blockCommentStart > -1) {
    comments.push({
      start: blockCommentStart,
      end: line.length,
    })
  }

  return comments
}

// 判断一个区域是否在注释范围内
function isInComment(range: Range, comment: Comment) {
  return range.start > comment.start && range.end < comment.end
}
按需开启
现在扩展激活时机是在
"activationEvents": [
    "onLanguage:css",
    "onLanguage:less",
    "onLanguage:scss",
    "onLanguage:postcss",
    "onLanguage:javascript",
    "onLanguage:javascriptreact",
    "onLanguage:typescript",
    "onLanguage:typescriptreact",
    "onCommand:color-changer.refresh"
],
如果一个项目没有颜色配置文件也不打算使用这个扩展,这个扩展也会激活然后持续监听,这不可避免也会有一些开销,除非让用户手动把这个扩展禁用,但显然这样太麻烦了,我们需要一个按需开启的机制。
let isStarted = false

// 核心的监听逻辑移动到这里了
function start(context: vscode.ExtensionContext) {
  if (isStarted) {
    return
  }

  isStarted = true

  const colorDiagnosticCollection =
    vscode.languages.createDiagnosticCollection('color-changer')
  context.subscriptions.push(colorDiagnosticCollection)

  subscribeToDocumentChanges(context, colorDiagnosticCollection)

  context.subscriptions.push(
    vscode.languages.registerCodeActionsProvider(languages, new ColorCodeActionProvider(), {
      providedCodeActionKinds: ColorCodeActionProvider.providedCodeActionKinds,
    })
  )

  context.subscriptions.push(
    vscode.workspace.onDidChangeConfiguration(evt => {
      if (evt.affectsConfiguration(ConfigName.colorrc)) {
        config.refresh(true)
      }
    })
  )
}

export async function activate(context: vscode.ExtensionContext) {
  context.subscriptions.push(
    vscode.commands.registerCommand(Command.Refresh, async () => {
      const isSuccess = await config.refresh(true)
      // 手动调用命令时再检查一次
      if (!isSuccess) {
        return
      }

      start(context)
    })
  )

  const isSuccess = await config.refresh(false)

  if (!isSuccess) {
    // 如果失败,说明项目里没有颜色配置文件,就不开启监听
    return false
  }

  start(context)
}
扩展冲突
我们开发时都会安装 eslint, 但 eslint 也提供了代码格式化的功能。
如果两个插件同时进行格式化,因为诊断信息的坐标是在格式化之前就计算好了。如果前一个扩展格式化代码后,导致坐标改变了,那么后一个扩展再使用原坐标信息格式化就不对了。
这个没想到好的解决办法,一个 workaround 就是检测到有 eslint/prettier 格式化相关的诊断信息时,不返回自动格式化的 CodeAction。这样的话:
- 第一次保存文件时,会调用 eslint 的格式化,不会调用我们扩展的格式化
- 第二次保存文件时,eslint 的格式化都已经被修复了,然后调用我们扩展的格式化
因为和影响代码格式相关的大多是 prettier 的规则,所以可以简单过滤掉 prettier 的诊断信息
provideCodeActions(
    document: vscode.TextDocument,
    _range: vscode.Range | vscode.Selection,
    context: vscode.CodeActionContext
    // token: vscode.CancellationToken
  ): vscode.CodeAction[] {
    const hasPrettierProblem = context.diagnostics.some(item => isPrettierProblem(item))

    return context.diagnostics
      .filter(ColorDiagnostic.isInstance)
      .reduce<vscode.CodeAction[]>((actions, diagnostic) => {
        actions.push(diagnostic.createFix(document, vscode.CodeActionKind.QuickFix))
        if (!hasPrettierProblem) {
          actions.push(diagnostic.createFix(document, vscode.CodeActionKind.SourceFixAll))
        }
        return actions
      }, [])
  }

function isPrettierProblem(diagnostic: vscode.Diagnostic) {
  const code = diagnostic.code
  const source = diagnostic.source

  return (
    source?.includes('prettier') || (code as any)?.value?.includes('prettier') // for eslint-plugin-prettier
  )
}
打包
功能都实现完了后,我们要进行扩展打包。扩展打包 VS Code 提供了 vsce 这个工具。
vsce package
前面特意强调了用 npm 安装依赖,如果使用 pnpm 安装依赖,node_modules里都是软链,vsce 打包会报错。因为 vsce 打包时会将 node_modules 一起打进去,除非加参数 --no-dependencies, 但是这样的话就要把第三方依赖也打包进来了,见 issue。如果使用 yarn,打包时也要加上 --yarn 。于是最简单的方案就是切换到 npm 了。
另外还有一个坑点是,vsce 打包 node_modules 也只会打包 dependencies 里的依赖,devDependencies 里是不认的。如果你的依赖加错了地方,你会发现你本地调试的时候是正常的,然后打包后安装使用,就用不了了, debug 时间++++。
我最终的打包 scripts
"scripts": {
    "package": "npm run build && vsce package",
    "minor": "npm version minor && npm run package",
    "patch": "npm version patch && npm run package",
    // ...
 }
运行 npm run package, 根目录下就会出现一个 .vsix 文件,右键安装就可以直接使用了。
完。